Most people drop their car off, grab a coffee, and come back to a clean interior without ever knowing what actually happened in between. That uncertainty is pretty normal. But if you're about to spend real money on a professional clean, you deserve to know exactly what you're paying for, step by step, before you hand over the keys. This guide walks through the whole process from the first look a detailer takes at your seats to the final protective spray. If you've been searching for Interior Car Detailing in Oceanside CA, this is what a thorough, properly done service actually looks like from start to finish.
Step One: The Pre-Clean Inspection
Nothing gets touched yet. Seriously, a good detailer walks through the whole cabin first, just looking. They're checking what kind of surfaces are in the car, whether that's cloth, leather, alcantara, or a mix. They're also noting stain types, because a coffee spill and a grease mark need completely different products.
Odor sources get flagged too. Pet smells, smoke, mildew from a leaky window seal, all of these have different causes and different fixes. Treating a mildew smell the same way you'd treat cigarette smoke is a mistake that wastes time and leaves the customer disappointed. The inspection also identifies problem areas like cracked leather, worn fabric, or sticky hard surfaces that need gentler handling.
This step takes maybe ten minutes but it shapes every decision that comes after. Skip it and you risk using the wrong product on the wrong surface. That's how leather gets stripped or fabric gets over-wetted and ends up smelling worse than before.
Step Two: Dry Extraction Before Anything Wet
Here's something most people don't realize. Liquid goes on last, not first. Before any spray bottle comes out, everything loose in the car gets pulled out through dry methods. Vacuuming, dry brushing, and compressed air.
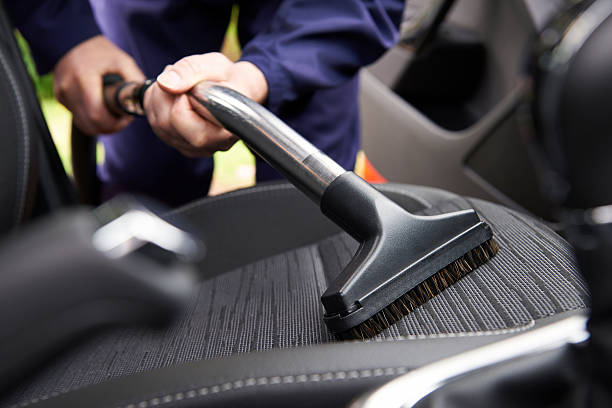
Seat crevices, floor channels, under the seats, the gap between the center console and the seat, all of it gets vacuumed thoroughly. Detailing brushes knock debris out of air vents, door panel seams, and dashboard trim gaps so the vacuum can pull it away. If you wet a surface that still has crumbs and grit sitting on it, you're just pushing that debris deeper into the fabric fibers or scratching the hard surfaces as you wipe.
Floor mats come out completely. They get beaten, brushed, and vacuumed separately. Trunk area too, if it's included in the service. Dry extraction sounds basic, but it's genuinely one of the most important parts of the whole job.
Step Three: Top-Down Surface Treatment
The order matters a lot. Detailers work from the highest surfaces down to the lowest, always. Start at the headliner, move to the sun visors, then the dashboard, then the seats, then the doors, then the floors. The reason is simple: any product drips, loosened dirt, or debris that falls during cleaning lands on surfaces you haven't cleaned yet.
If you cleaned the floor mats first and then scrubbed the seats, whatever came off the seats would fall right onto your clean mats. You'd be doing the work twice. Top-down sequencing prevents that entirely.
Headliners are delicate and get treated carefully, usually with a light spray and a soft microfiber, no aggressive scrubbing. Dashboards and hard trim get wiped with an appropriate cleaner. Then the process moves down. This kind of deliberate order is one of the things that separates a professional result from a hasty DIY clean.
Step Four: Fabric, Leather, and Hard Surface Treatments
This is where the real work happens, and it's different depending on what's in your car. Cloth seats typically get an enzymatic cleaner or a fabric-specific shampoo worked in with a stiff detailing brush, then extracted with a wet-dry vacuum or a hot water extractor. Steam cleaning is another option, especially for stubborn stains or sanitizing purposes. According to the EPA's guide on indoor air quality, steam is one of the more effective ways to reduce allergens and bacteria on soft surfaces without heavy chemical use.
Leather is a different situation entirely. It can't handle the same aggressive scrubbing or high-moisture methods. A pH-balanced leather cleaner goes on first, worked in gently, then wiped clean. Cracked or dry leather gets a conditioner after cleaning to stop further damage. Shak's Shine Auto Spa is one of the local options in the area that handles both fabric and leather in the same appointment, which saves a lot of back-and-forth for car owners with mixed-material interiors.
Hard surfaces, things like the center console, door handles, cupholders, and plastic trim, get scrubbed with detailing brushes and an appropriate all-purpose cleaner. Vents are some of the dirtiest spots in any car and they need a thin brush to get into each slat. Steering wheels get special attention too since they collect oils and bacteria from hands constantly.
Interior Car Detailing Services in Oceanside CA typically include all of these surface types in a full package, though it's always worth confirming with the shop exactly what's covered before you book.
Step Five: Glass and Mirror Cleaning
Interior glass is its own category. The inside of windshields and windows builds up a film over time, a mix of off-gassing from plastics, smoke residue, and general humidity. That film causes glare, especially at night. A standard glass cleaner and a clean microfiber, used in two passes, takes care of most of it. Some detailers do a dry pass first and a wet pass second to avoid streaking.
Don't skip the rear window defroster lines. Wiping across them too hard can damage them, so a good detailer wipes with the lines, not against them. Small detail. Makes a real difference.
Step Six: Final Protection and Finishing Pass
The last phase is about protection and presentation. Fabric seats often get a fabric guard spray applied after cleaning and drying, which helps repel future spills. Leather gets its conditioner if it wasn't applied in the previous step. Plastic and vinyl trim gets a non-greasy dressing that restores some color without leaving that slick, oily look.
Odor treatment happens here too if it's needed. An enzyme-based spray or an ozone treatment can handle smells that surface cleaning alone won't fix. The cabin should smell neutral and clean when you get back in, not like a heavy air freshener masking something worse underneath. Interior Car Detailing Services in Oceanside CA done right will leave the cabin smelling genuinely fresh, not just covered up.
A final walkthrough checks for anything missed. Fingerprints on the rearview mirror, a spot on the headliner, a streak on the passenger window. That last pass is what separates a rushed job from one that actually holds up when you look closely.
Frequently Asked Questions
How long does a full interior detail usually take?
Most full interior details run between two and four hours depending on the size of the vehicle and how dirty it is. A small sedan that's reasonably clean might be done in two hours. A large SUV with kids' crumbs everywhere and a dog smell? Plan on closer to four or five.
Do I need to clean out my car before dropping it off?
Remove your personal belongings, loose change, sunglasses, stuff you actually need. But don't stress about cleaning it before the clean. That's what you're paying for. Detailers expect the car to be dirty. It's their job to sort it out.
Can interior detailing remove pet hair completely?
Usually yes, but it depends on how embedded the hair is. Short pet hair on cloth seats can be stubborn. A good detailer uses rubber brushes or pet hair tools before vacuuming, which lifts the hair so the vacuum can pull it out. Deeply embedded hair in worn fabric sometimes takes multiple passes.
Is steam cleaning safe for all surfaces?
Steam works well on cloth, hard plastic, vinyl, and glass. It's generally not recommended for bare leather without proper conditioning afterward, and it shouldn't go near electronics or screens. A professional knows where to use it and where to hold back.
How often should I get a full interior detail done?
Twice a year is a pretty common answer for most car owners. But if you've got kids, pets, or you eat in your car regularly, quarterly makes more sense. A light clean every month or two between full details keeps things from getting out of hand.
Knowing the process ahead of time makes the whole experience less of a mystery, and honestly, it helps you spot the difference between a shop that's actually doing the work and one that's just running a vacuum and calling it done.
Comments